Skip to contentSkip to sidebarSkip to footer
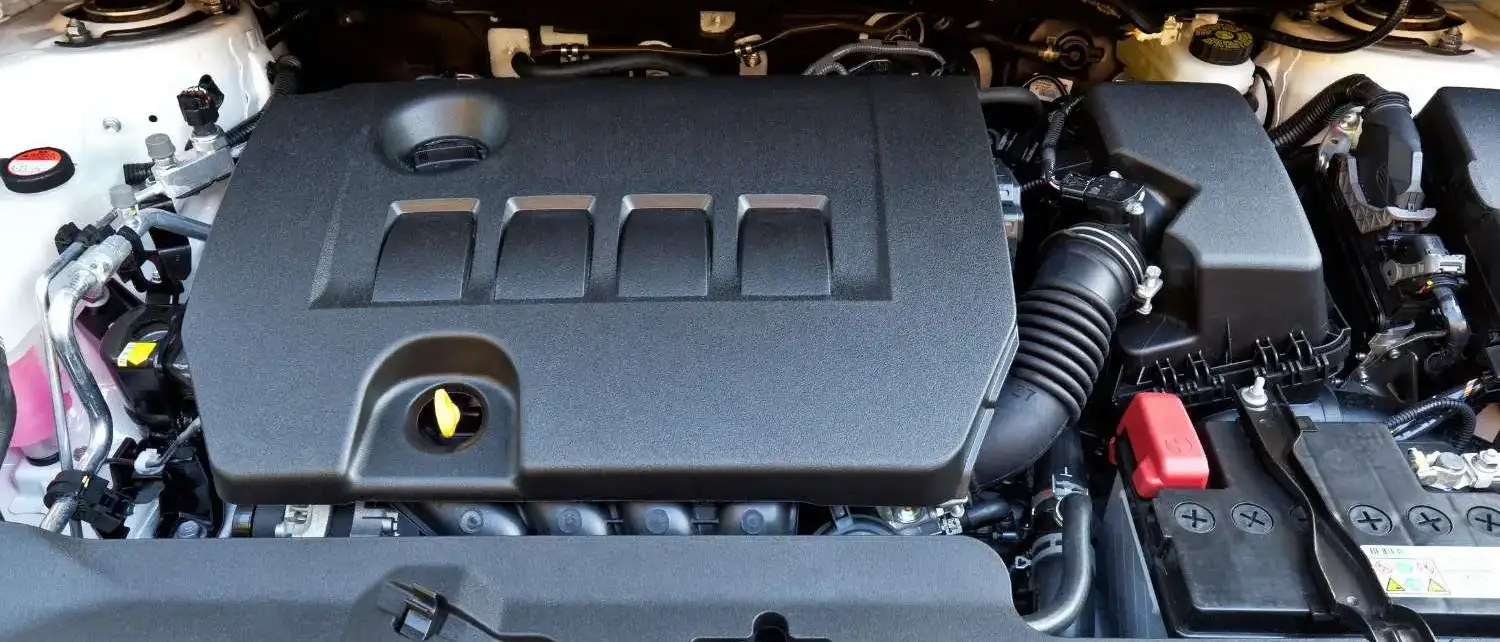
While many can overlook the engine bay, engine detailing revamps the look of your engine. Over time, grime, dirt, oil, and other contaminants accumulate under the hood, making it look neglected. Regularly cleaning this area will remove the dirt and grime, restoring it to a like-new appearance. This enhances your vehicle’s overall presentation and can help maintain resale value.
Additionally, a clean engine bay is easier to work on and diagnose if problems arise. So don’t underestimate the value of a well detailed engine for both appearance and car maintenance.
How is an Engine Bay Cleaned?
-
Safety Preparations: Begin by disconnecting the battery to avoid any electrical issues. Cover all sensitive areas, such as electrical components and the alternator, with plastic bags or protective coverings to shield them from water and cleaning chemicals.
-
Degreasing: Using a degreaser or all-purpose cleaner (APC) spray it evenly across the entire engine bay, making sure to reach every corner and crevice.
-
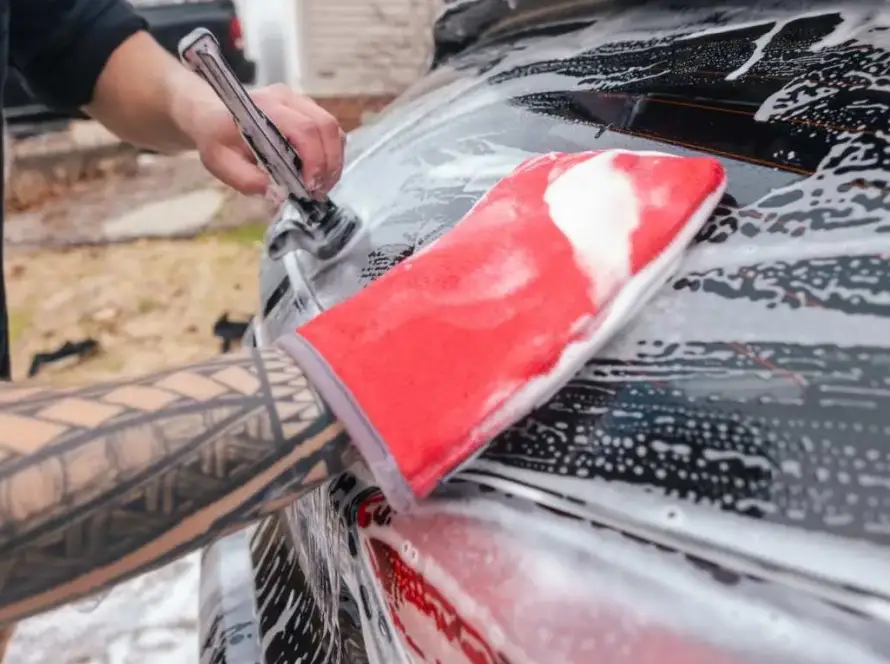
Agitation: Use a detail brush to gently agitate the degreaser on the surface. This helps lift and break up oil, grime, and dirt buildup, making it easier to rinse away.
-
Rinsing: Carefully rinse the engine bay with water, ensuring all the degreaser and loosened dirt are washed away. Avoid direct water contact with sensitive components, even if they’re covered.
-
Drying: Thoroughly dry the engine bay using microfiber towels or compressed air. It’s important to remove all moisture to prevent electrical issues.
-
Protecting: Apply a water-based engine protectant or dressing. This adds a shine to your engine bay and provides a layer of protection against dirt, dust, and UV damage.
-
Final Steps: Once everything is dry and the protectant has been applied, remove the protective coverings from sensitive areas. Reconnect the battery, ensuring all connections are secure.
Engine Bay Clean Process
Make sure your engine is cool before starting the cleaning process.
- Safety Preparations: Start by disconnecting the battery to avoid any electrical issues. Cover all sensitive components, such as electrical components and the alternator, with plastic bags to shield them from water and cleaning chemicals.
- Degreasing: Using a degreaser or all-purpose cleaner, spray it evenly across the entire engine bay, ensuring that every nook and cranny is reached.
- Agitation: Use a detailing brush to gently scrub the surface. This helps lift and break up oil, grime, and dirt buildup, making it easier to rinse away.
- Rinsing: Carefully rinse the area with a hose or pressure washer, ensuring all the degreaser and loosened dirt are washed away. Avoid direct water contact with sensitive components, even if they’re covered.
- Drying: Thoroughly dry the area using microfiber towels or compressed air. It’s important to remove all moisture to prevent electrical issues.
- Protecting: Apply a water-based engine protectant or dressing. This adds a shine to your engine compartment and provides a layer of protection against dirt, dust, and UV damage.
- Final Steps: Once everything is dry and the protectant has been applied, remove the protective coverings from sensitive components. Reconnect the battery, ensuring all connections are secure.
Tools Needed to Detail Your Engine Bay
To begin the engine detailing process, ensure you have the following items ready:
- Engine Degreaser or All-Purpose Cleaner: Essential for breaking down dirt and oils that accumulate in the engine compartment.
- Water-Based Engine Dressing: For a finishing touch that protects and shines your clean engine bay.
- Gloves: To protect your hands from chemicals and dirt during the auto detailing process.
- Plastic Bags: To shield sensitive components of the car engine from water and cleaning products.
- Microfiber Towel: For removing dirt and grime and drying the engine bay after the detail.
- Detailing Brush: To scrub and remove stubborn dirt in hard-to-reach areas.
- Blower/Compressed Air: Used for removing any dirt or debris from tight spaces.
- Pressure Washer or Hose: This is for a thorough rinse of the engine bay to remove all cleaning products. You can also use a regular hose if a pressure washer isn’t available.
With these tools and supplies prepared, you’re set to detail your engine bay and restore its appearance!
Preparing Your Car Engine for Cleaning
Before starting the engine detailing process, make sure your engine is cool, this way it’s safe to work on the engine bay without the risk of burns from hot components.
The preparation process of your car engine is important for a successful detail. Here’s how to prepare your engine:
- Disconnect the battery: To avoid short-circuiting the system, you’ll need to remove the negative terminal from the battery before starting the cleaning process.
- Cover sensitive components: Electrical components are sensitive to water and can easily get damaged. Use plastic bags to cover sensitive components like electrical connections and the alternator, or any visible wires, and secure them with rubber bands or zip ties.
- Remove any debris: Before you start applying any cleaning products, remove any visible debris. Use a brush or air blower to remove loose dirt from the surface.

Step-by-Step Engine Detailing Process
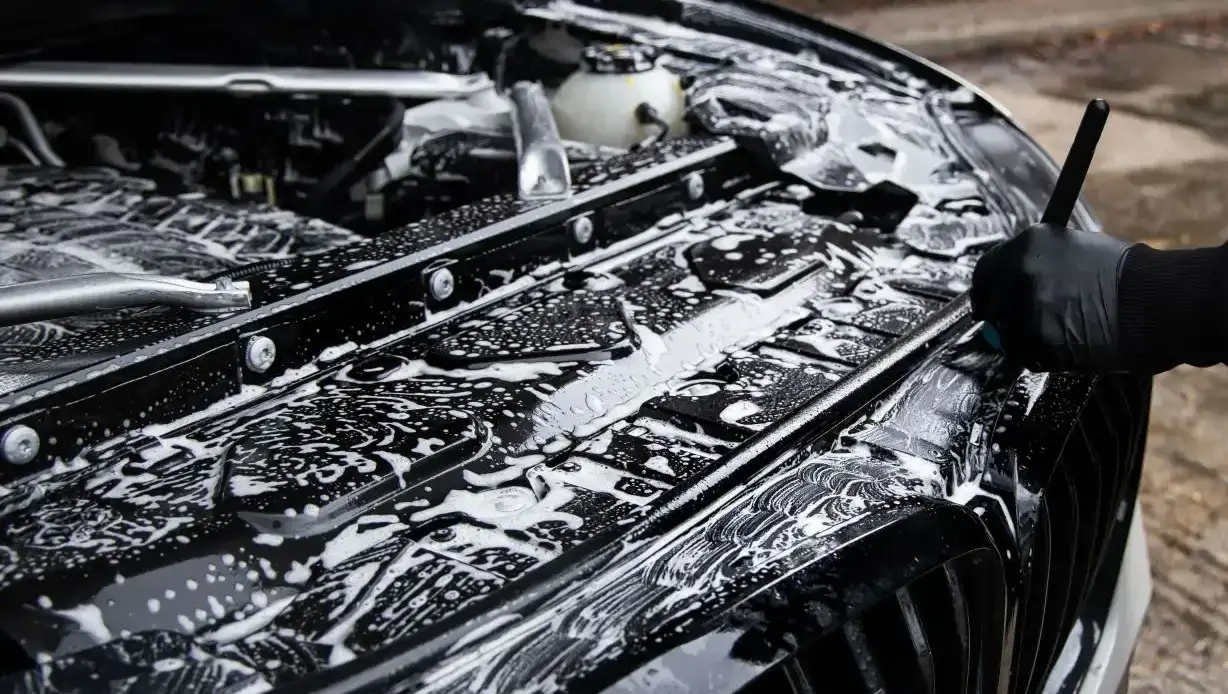
Step 1: Applying the Degreaser
Apply the degreaser or all-purpose cleaner evenly across the engine bay. Ensure it reaches the crevices and hard-to-reach areas where grime tends to accumulate.
After the degreaser has been applied, allow it to dwell for a few minutes. The degreaser works by breaking down dirt, grime, and contaminants, preparing the area for rinsing.
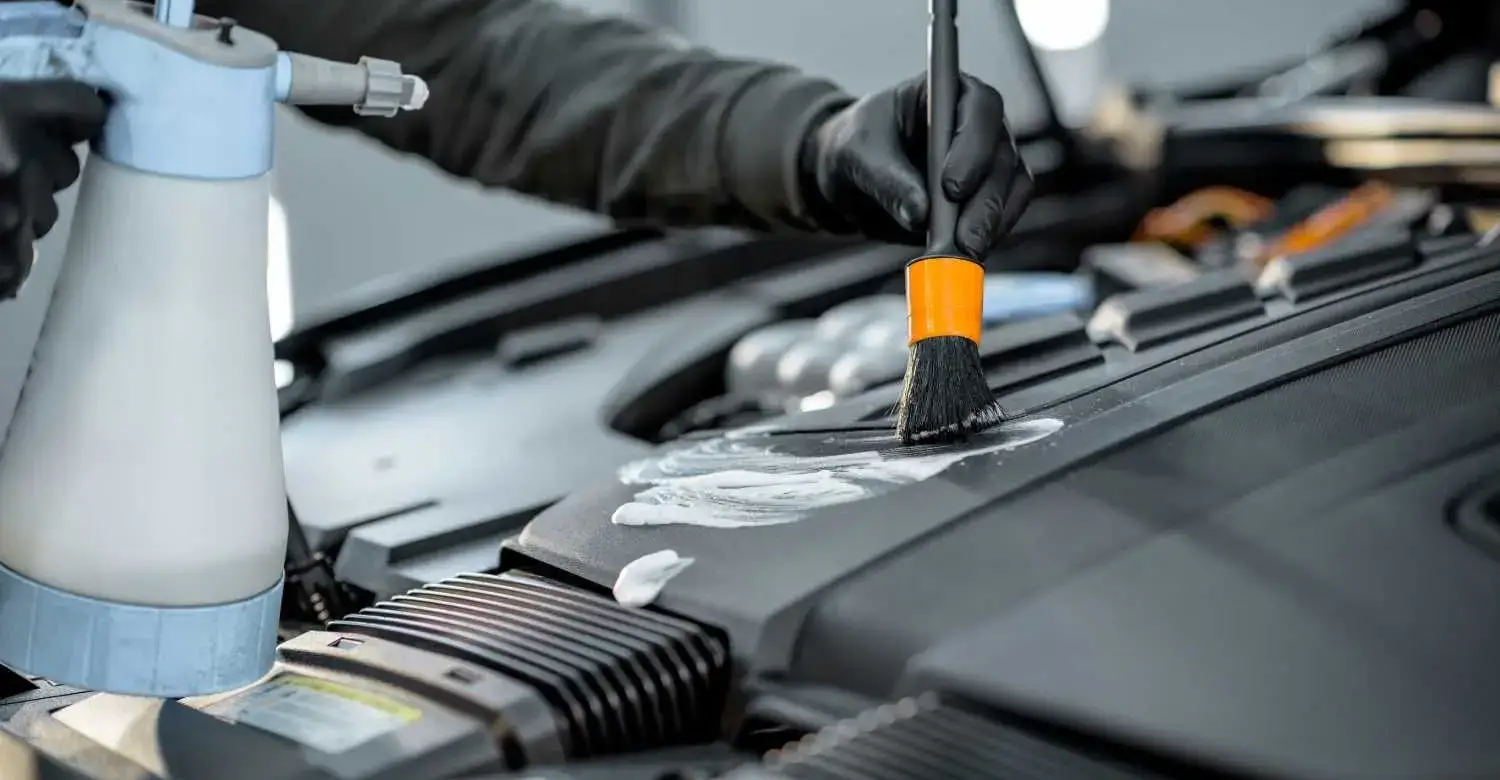
Step 2: Scrubbing the Engine
Once the degreaser has dwelled for a few minutes, use a detailing brush to scrub the engine bay, focusing on areas with caked-on oil and dirt. This step is important because it agitates and loosens the stubborn grime that clings to the engine bay.
Focus on removing dirt and debris from every accessible surface. Make sure you cover all areas before moving to the rinse step.
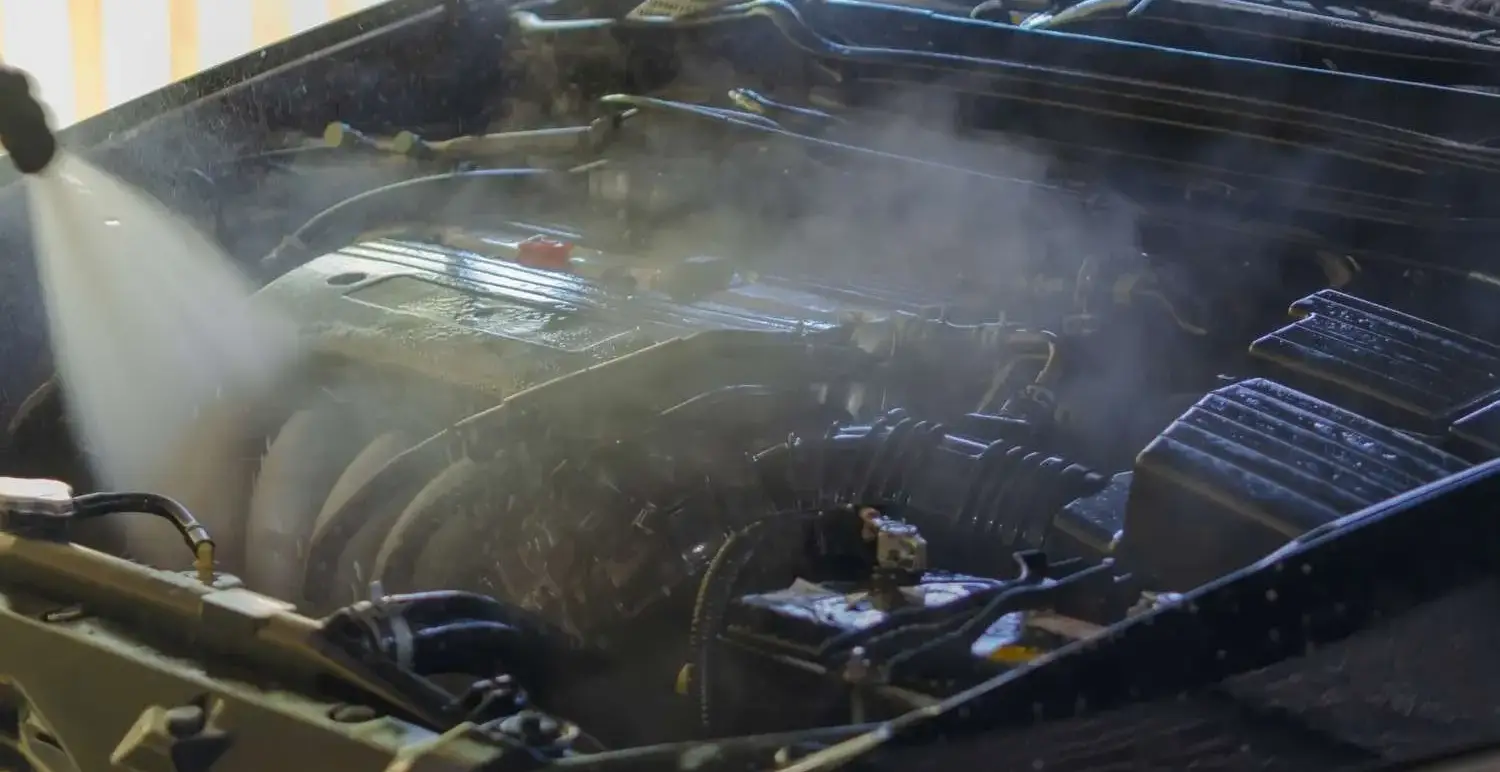
Step 3: Rinse with Pressure Washer
After you’ve finished scrubbing the engine bay, use a pressure washer to rinse all the loosened dirt and cleaning products. The pressure washer provides a powerful stream of water that can reach tight spaces and hard-to-reach areas in the engine bay. It’s an effective tool to remove stubborn dirt, grime, and grease that you couldn’t get rid of during the scrubbing process.
But don’t just blast water everywhere. You’ll want to exercise caution when using a pressure washer. Directing its stream towards sensitive components or electrical connections can lead to damage. Instead, avoid the electrical component, sensitive areas, and maintain a safe distance.
Use your pressure washer to thoroughly remove any leftover degreaser and residues. This is an important step, because any leftover product can hold dirt, defeating the purpose of the engine detail.
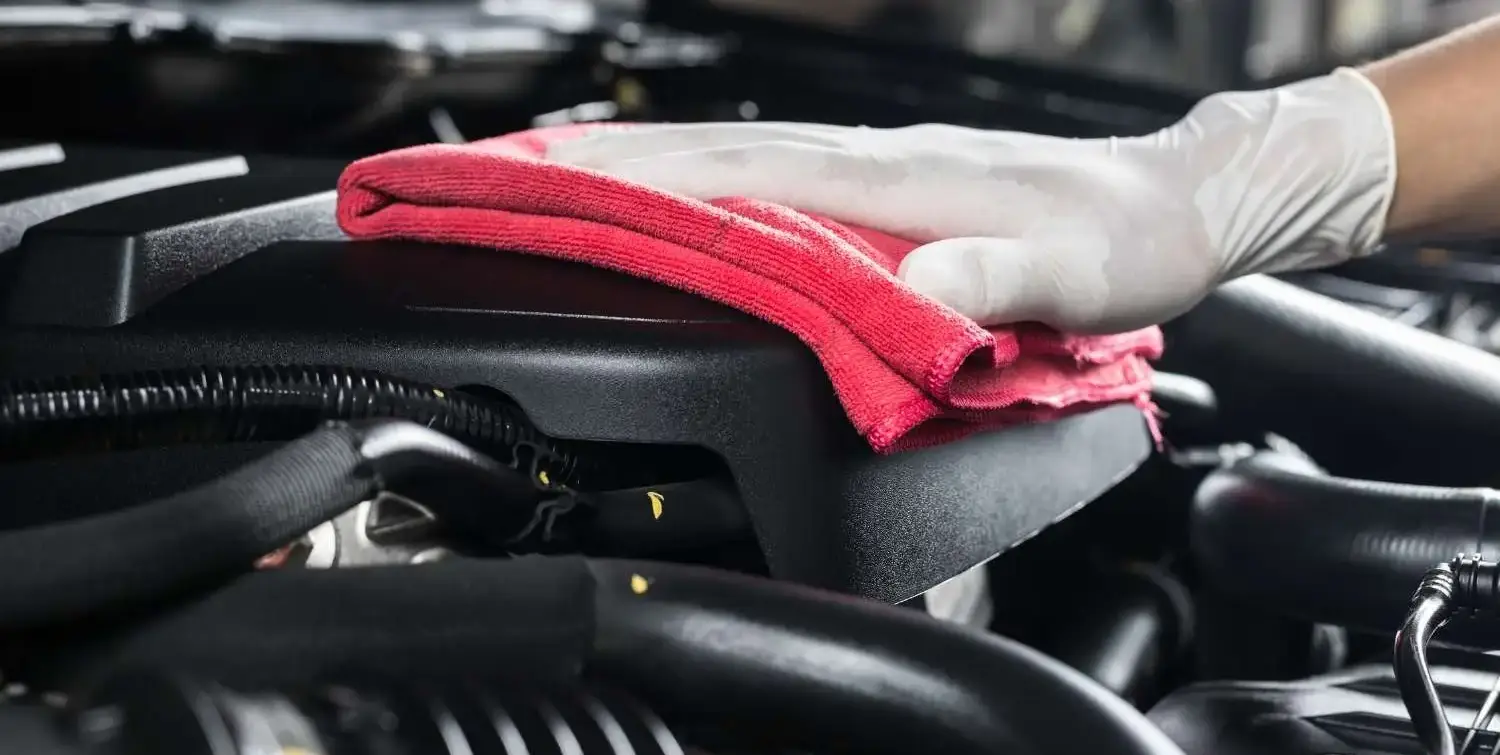
Step 4: Dry the Engine Bay
After rinsing the with the pressure washer, grab a clean microfiber towel or use compressed air to thoroughly dry the engine bay. You want to make sure all the water and moisture are removed because any leftover moisture could cause issues with your engine’s electrical components. Pat and wipe down the engine bay gently to remove excess water throughout the entire engine.
Step 5: Apply Engine Bay Protection
With your engine bay thoroughly dried, the next step is to apply a water-based engine dressing to add shine and restore its appearance. This process enhances the appearance of your engine bay and forms a protective barrier against dirt and grime buildup.
The application process is simple. First, make sure the engine is dry, then evenly spray the engine dressing across all surfaces of the engine bay, focusing on exposed areas. Finish by gently wiping away any excess product to ensure a uniform finish.
Keeping Your Engine Bay Clean
To keep your engine bay looking its best, it’s essential to maintain it. Here’s how you can keep your engine clean and looking great.
- Park in a garage or cover your car: This shields the engine bay from dirt and debris, which can accumulate and affect the appearance over time.
- Wash your car regularly: This prevents the buildup of grime and contaminants in the engine bay as part of your regular car care routine.
- Get professional detailing service: Every once in a while, have your car detailed professionally. This gets your engine bay really clean in ways you can’t do yourself at home.
- Use mobile detailing services: For convenience, consider mobile detailing services where they come to you and get the work done right at your doorstep.
FAQs
How Much Is an Engine Detail?
Engine detailing costs can vary depending on where you live and how dirty your engine bay is. You’re typically looking at anywhere from $50 to $150. Check with local auto detailing shops to get an accurate price for your specific situation.
Is It Safe to Detail the Engine Bay?
Yes, it’s safe to detail your engine bay when you do it right. Modern engines can handle getting cleaned as long as you take the right precautions. Just don’t spray water directly on electrical parts, and make sure to cover sensitive areas before you start.
Do I Need Engine Detailing?
Yes, engine detailing is worth it for keeping your car looking good. Plus, when everything’s clean, it’s easier to spot leaks or other issues during mechanical maintenance. It really improves how your car looks and could help with resale value too. You can do it yourself or hire a professional detailing service.
Final Thoughts
Cleaning your car’s engine bay is a part of comprehensive auto detailing for appearance purposes. By following the steps and using the right products, your engine bay will look clean and as good as new. Regular engine bay detailing will help maintain your vehicle’s presentation and overall value.